


Working for the liberation of all beings everywhere. Bringing higher consciousness to the planet, one eternal moment at a time.
Chapter 15
Making an Ashanti Hoop Drop Earring
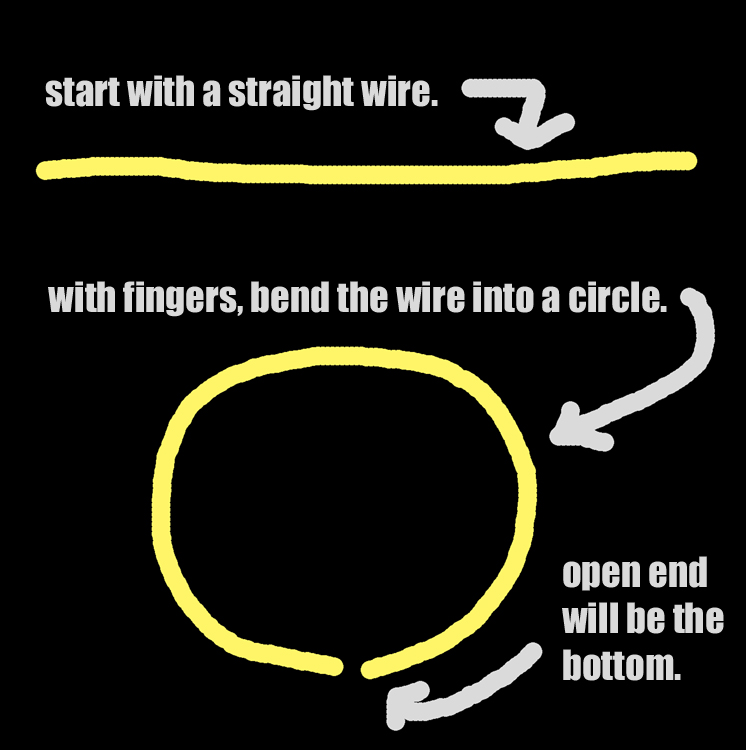
Start with a straight wire.
Start with a piece of straight .14 gauge silver or .16 gauge copper wire. With your fingers only, bend the wire into a circle with a small gap between the ends, about 6mm apart, roughly 1/4″ of space between the ends of the wire.
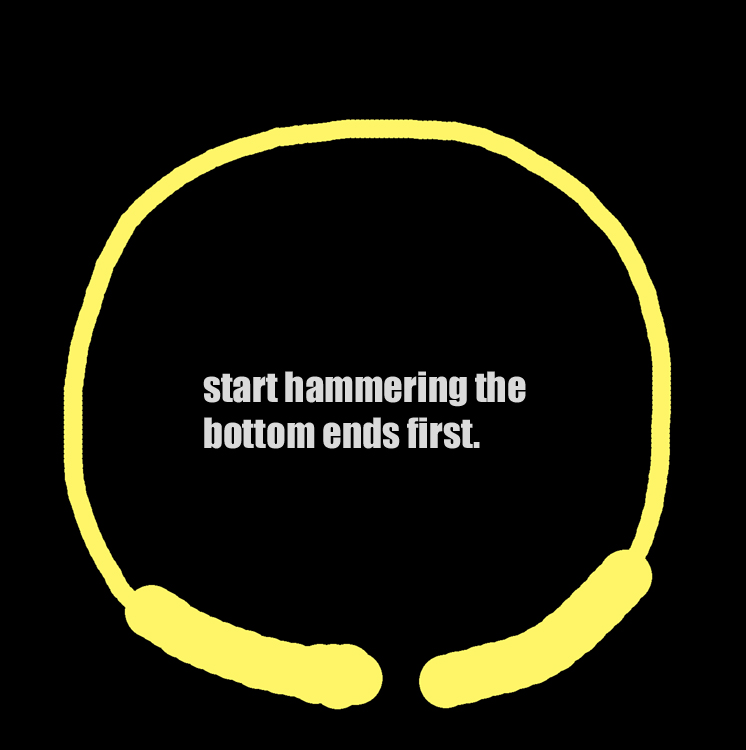
Start hammering and flattening at the bottom.
Start hammering at the bottom ends first, just a little, not all the way just yet.
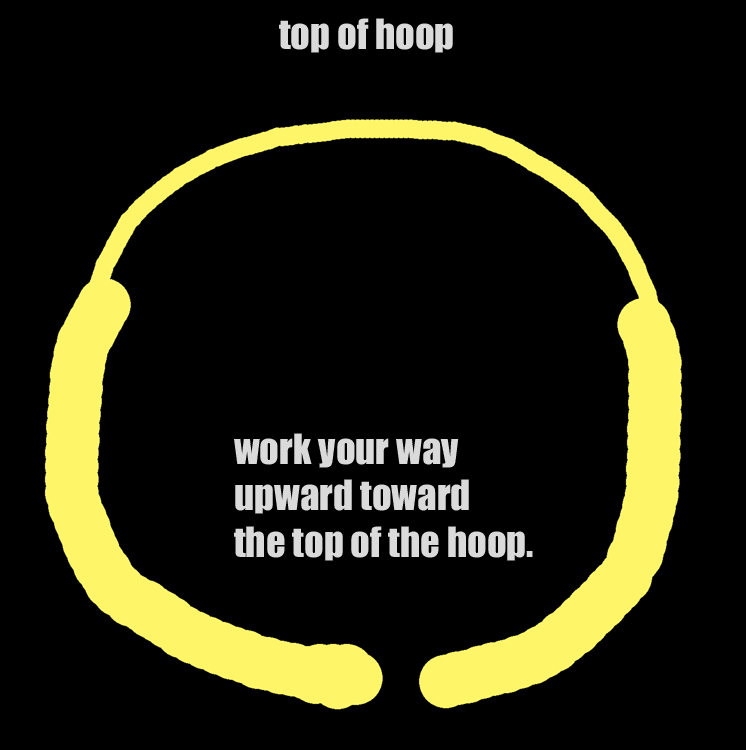
Work your way upward.
Slowly, taking your time to observe the actual momentary effect of each hammer stroke, form the metal into shape, working your way upward along the wire toward the top, but not hammering the very top.
Leave the top 1/3 of the hoop alone, let it be round, unless it wants to sag, in which case, gently tap it a few light taps to make it firmer. The heat of the hammer-tap tempers the metal slightly, making it more brittle, less soft and malleable.
Remember this: every bend you make in the metal reduces its flexibility. The faster you bend the metal, the weaker you make it -- the more susceptible to engineering failure, wear & tear and accident.
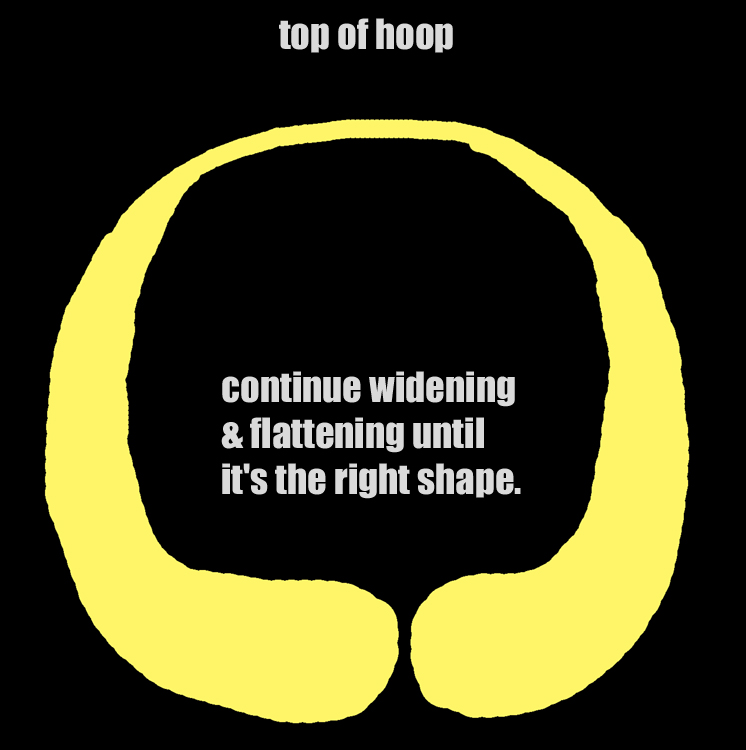
Work the metal into the right shape.
Continue widening and flattening the bottom ends, being careful not to go too far, meaning, don't make them too flat or they will become sharp or badly shaped.
Be attentive to what is happening to the metal at each hammer-stroke, and don't let it get out of control. You will soon learn that you can "lead" the metal with your hammer by angling the hammer blow just right, actually drawing the metal toward your hammer, in the direction you decide is right.
A hammer doesn't just go down -- it's almost never a direct flat-on strike unless delivered by a professional carpenter or tool & die maker. It's amazing, but true -- the angle of strike, not the angle of the hammer-head, and the "drawdown" of the strike, will create different results than simple "bang-bang" hammering.
The metal can be drawn out in any direction.
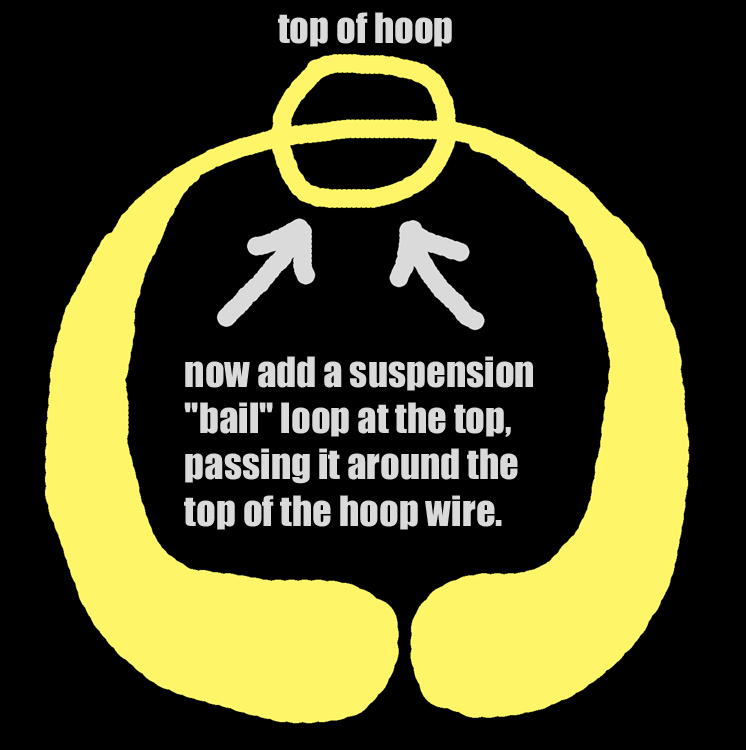
Add a bail loop at the top of the hoop.
when the hoop looks as right as you're going to get it, it's time to affix the bail loop, so you can hang it from an earring wire or place it on a necklace.
There is another way to do this, but it ruins the circular effect. I'll show you how this alternative top-loop is done:
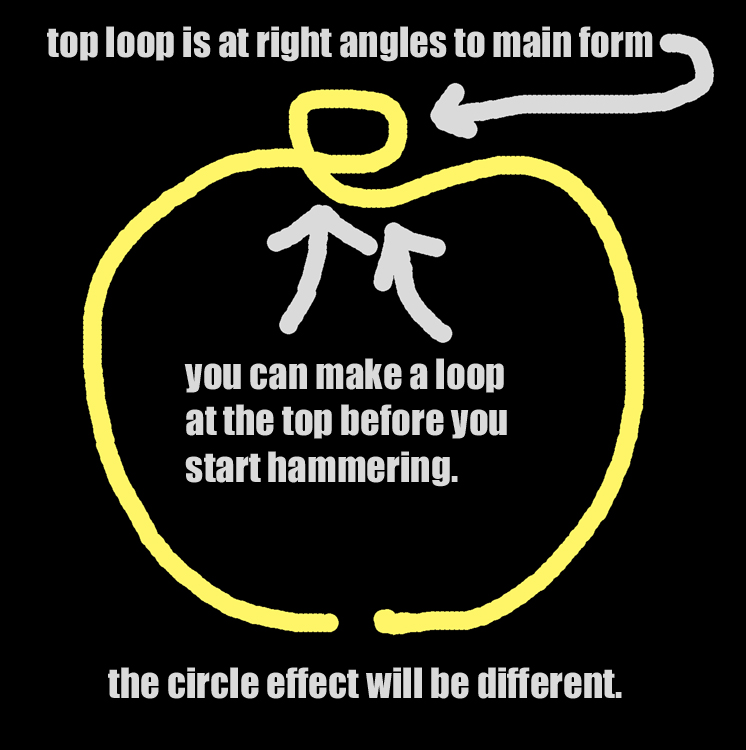
You can add a top loop to the hoop like this.
You can make a loop at the top of the hoop before you start hammering. Note that the top loop is opposing the bottom loop, and that it is made on the same plane as the hoop, then with the needlenose pliers, gently COAXED into a 90 degree angle, at RIGHT ANGLES to the hoop form.
There will be a gap in the top turn until you learn how to handle the metal and make it stay in place. You can use this loop as it is, or leave it on the same plane as the hoop and put another loop through that one, to increase the amount of wiggle room.
There's nothing quite like a group of articulated flattened hoops, and they have a surprisingly large set of applications to all sorts of personal adornment.